.png)
Creating an Email Template
Create a new template
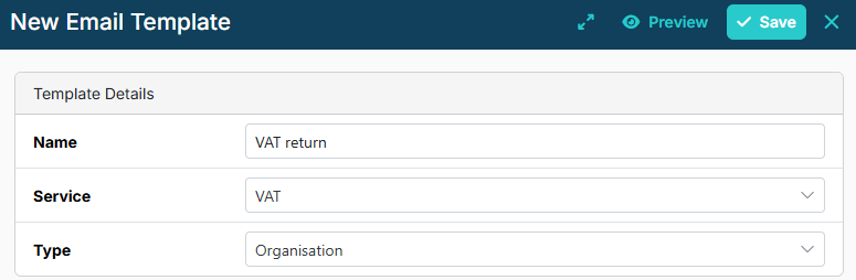
- To create a new email template, click the Add Template button. You will be prompted to enter the following information: Name – template name for your internal reference.
- Service – select service from the drop-down list such as VAT, Accounts, Payroll.
- Client Type – Organisation or Individual.
Template Content
Once the basic details are entered, you can define the email content:
- Subject: Write the subject line as you want it to appear in the client’s inbox.
- Body: Enter the body text of the email.
You can personalise the email using merge fields, accessed by typing a { curly brace. This opens a dropdown menu of all available fields from the system relevant to the client type you selected earlier, such as client details, task deadlines and contact names. Note: once you have selected a field, the name is enclosed by double curly braces.
Example
Here is how a simple VAT reminder email might look:
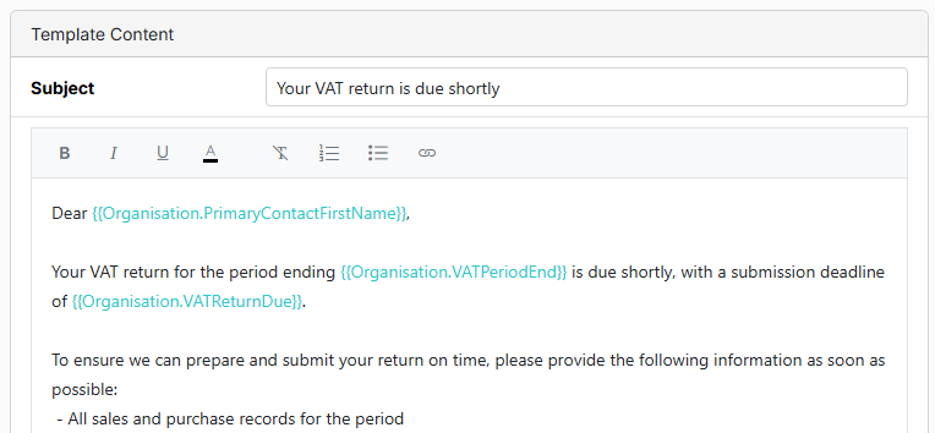
You can insert merge fields in both the body and subject line. Although the subject line does not provide a dropdown list, so merge fields need to be typed manually using the correct syntax and double curly braces.
Previewing and Testing
Before using an email template in live tasks, you can preview it to check formatting, wording, and the correct use of system fields. Previewing shows how the template will appear when populated with data, allowing you to confirm that placeholders are positioned and phrased correctly.

If you want to see how the email looks when received, replace the “Email To” address with your own email address before sending.